top of page

the process
step 1: armature set up and classroom sculpting
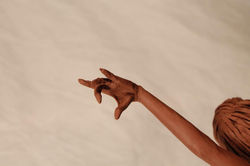
An armature of wire attached to a base is generally positioned in the pose you wish to sculpt your figure. Clay is then applied to the wires, forming the figure's body. A picture is sometimes used for the initial pose, but sculpting is done with a live model who assumes the pose chosen for the sculpture. The piece slowly takes shape and when the artist is satisfied with the general anatomy hair and fine details such as fingers, toes, vertebrae and ribs are applied.


step 2: finished clay sculpture
Once the artist has the finished clay figure, it is taken to the foundry where multiple photos are taken and decisions made with the Foundry staff as to the best casting procedure. In this case, the hair was deemed to difficult to cast in bronze so modifications to the initial sculpture were necessary.
 |  |  |  |  |
|---|---|---|---|---|
 |  |  |  |  |
 |  |

step 3: wax mould
The foundry makes an initial casts in wax. At this point, the artist is able to refine the details such as facial features, add and smooth the figure. In this figure, hair was added back into the wax cast.


step 4: the bronze cast
The mould has now been poured in bronze. At this stage the artist looks over the cast for flaws and areas that require smoothing or filling in. The patina, or coloration applied to the bronze is chosen. For this piece I chose to have it polished in a bright gold with a light ___________ overall stain, and a dark stain for the hair.

Kat bronze cast back

Kat Bronze cast front

Kat Bronze cast right side

step 5: the finished bronze!
Presented on a granite base, the bronze figure is finished. At this stage clothing or other accessories can be added by the artist.

bottom of page